This is my first DIY home improvement project and it's very backbreaking but very rewarding.
We consulted a company who builds patio and with a 15 ft. by 15ft. and materials on the near low quality, they asked for $4,000.00! Whew! Actually they asked way more than that and the 4K is their "bargain". There is no way we are spending an arm and a leg for a patio with low end quality brick pavers.
Somehow I suspected that we don't have to pay that much to have a patio we wanted. So I went online and jotted all materials needed and went and bought them. I got to lay it out the way I like it... plus... I got to put retaining wall on all my flower beds ( yes! patio and flower bed ret. walls for a total of $1,500.00!).
So after the laborious digging, leveling, tamping, laying out pavers and all that stuff, I came up with this...
 |
| ..and ..it matches our brick house |
Tools needed:
shovel
tamper
rake
rubber mallet
level
hammer
compactor
broom
water hose
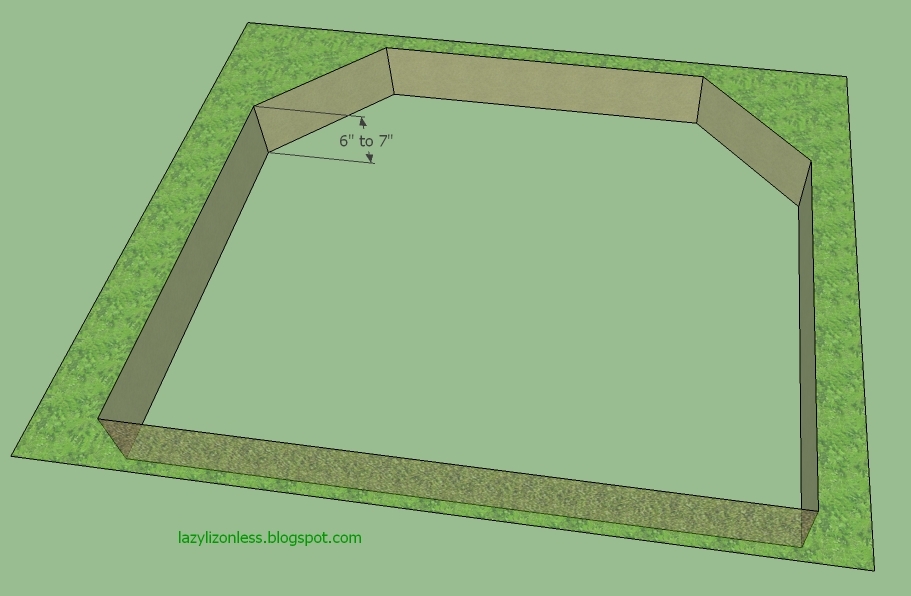
→ I designed, measured and marked my planned patio area 6" wider on all sides than the actual finished area.
My patio measurement is on the sketch.
→ To estimate the materials needed; first, I calculated my area.
For rectangle : Area = L X W
So my patio area = 15' 5" X 18' 4" = 285.2 sq. ft. ≈ 286 sq.ft. (I didn't subtracted the 36" X 36" for extra materials in case some breaks)
→ Dig the area to about 6" deep
 |
| 6" for 4" gravel, 1" sand and brick height |
→ Using the area calculated, I cut a landscape fabric approximately the same as that of project area and lay it out. This will prevent weeds from growing on my finished patio.
→I installed 4" compacted finely crushed gravel.
To calculate the cubic of crushed gravel needed, I multiplied the area to 4" (0.333 ft)
Cubic crushed gravel needed = 286 X 0.333 = 95.5 cu.ft.(compacted)
→ Then 1" (0.083) compacted paver sand using 2" x 4" board. Note: it should be sloping away from the house , 1/8" slope every foot for rain water to flow away from the house.
Compacted paver sand needed = 286 X 0.083 = 24 cu.ft.
→ Install paver restraint edging and spikes around the entire project. Calculate the perimeter of the project area to know how long edging is needed.
For example my patio perimeter is (185" X 2 sides) + (220" X 2 sides) = 810" or 67.5' length of edging needed. Subtract one side if the patio will be attached to porch or side of house.
→Lay the paver. To calculate how many bricks needed, divide the area of each brick to the total area calculated of the patio.
For example, my calculated patio area is 286 sq.ft. and the bricks I used was 8" X 4" red holland stone, therefore the brick area is 0.223 sqft.
so, number of red holland paver I used was 286/0.223 = 1,283 pieces.
→Finally pour sand and sweep with broom to fill up the joints. Use hose and wash sands to joints. Use compactor if available. Fill the edges with dirt and sod.
Patio materials thickness
and VOILA!! a nice patio to enjoy.
Pin It

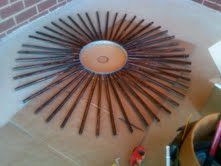
 Finding this round thing for the back support for my mirror was a bit of struggle. I went to all my local craft stores (Micheal's, Hobby Lobby, Jo-ann's and Hancock) and they all don't have it or not in stock. So I thought maybe Lowe's have them but they don't. I was about to just give up and buy a piece of plywood and cut the round size I need from it but that would be a lot and lot of work as I don't have the right tool for it.