
 |
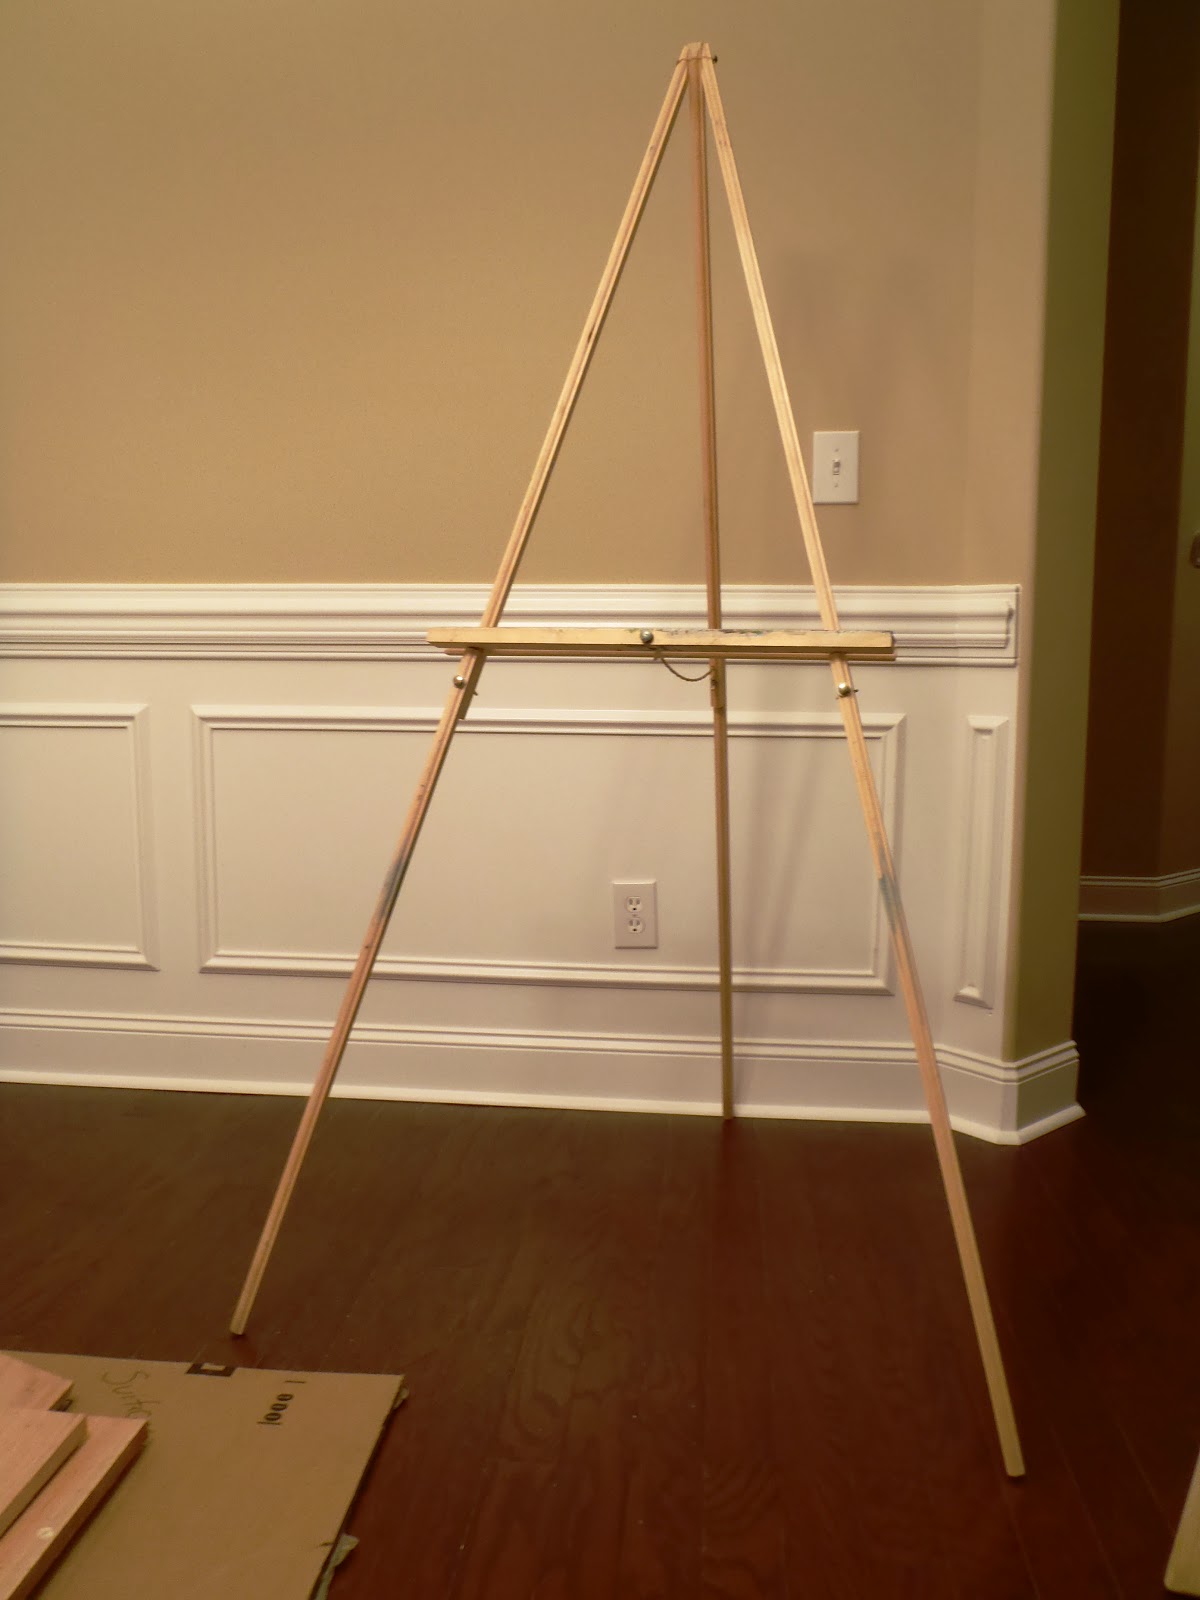
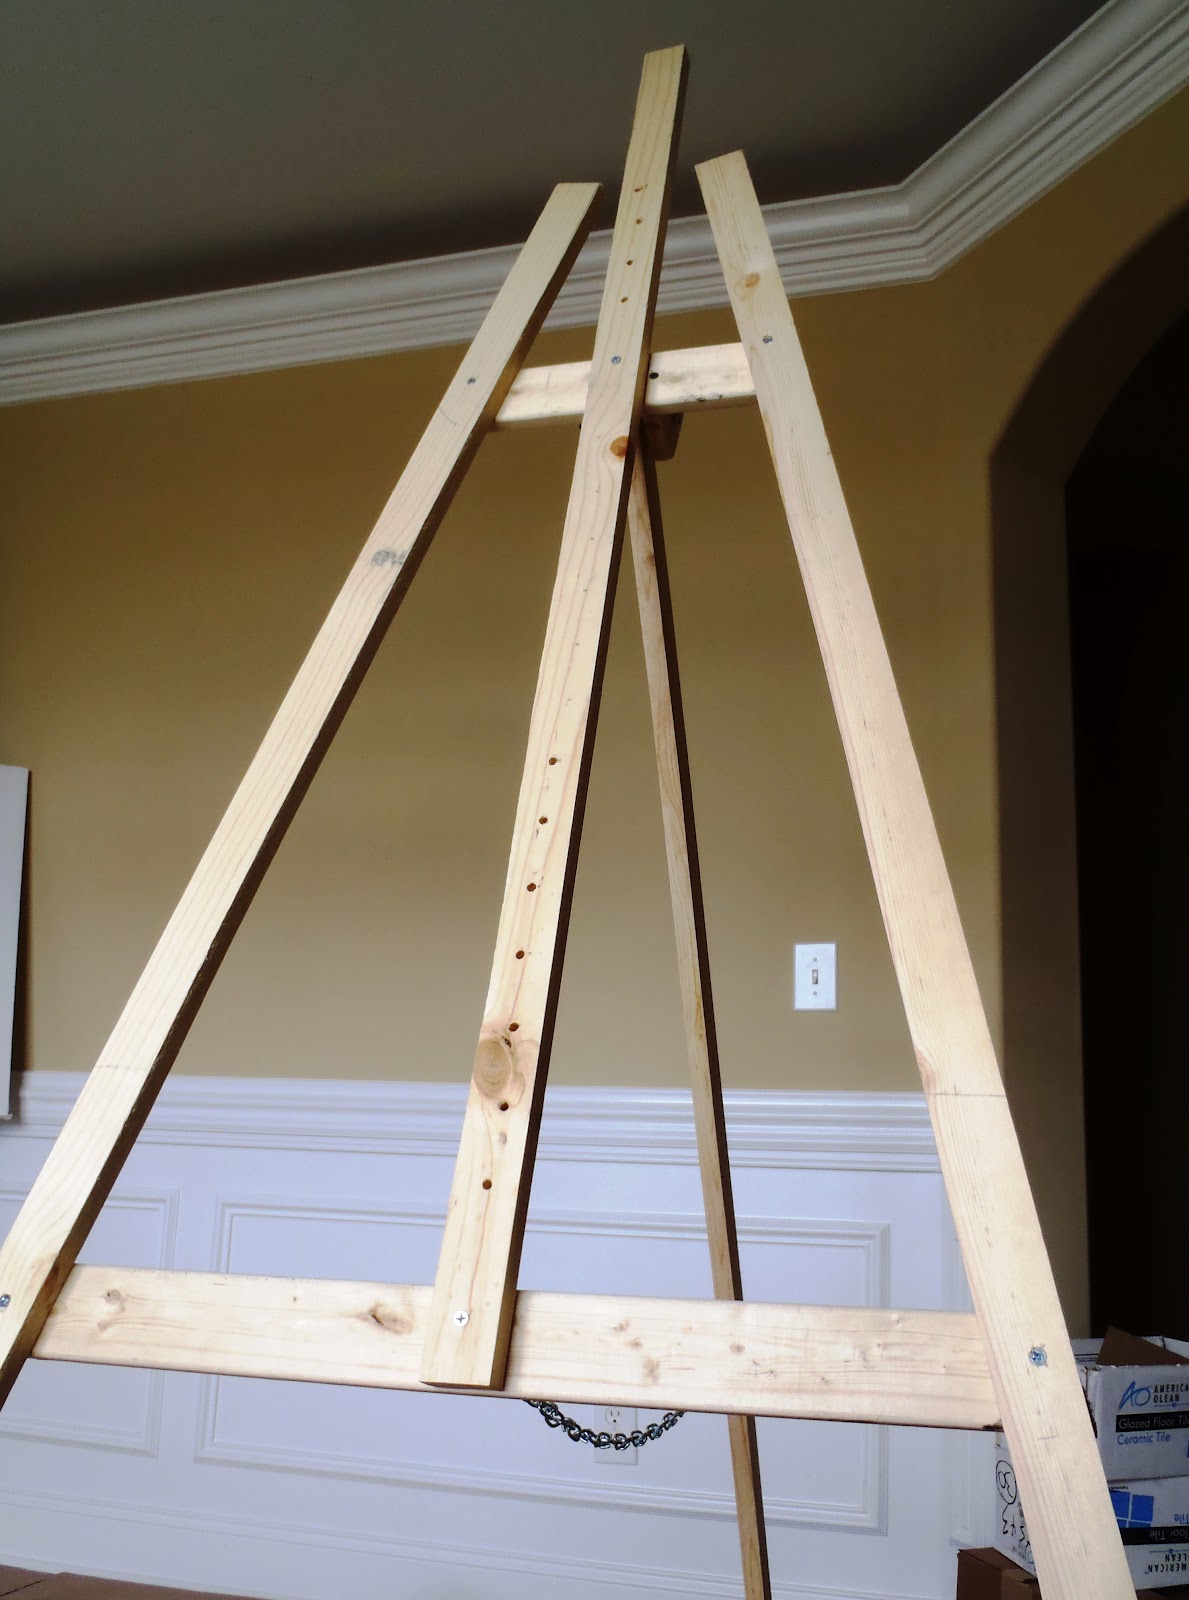
| We bought this flimsy easel couple of years ago and for a while, it worked fine. |
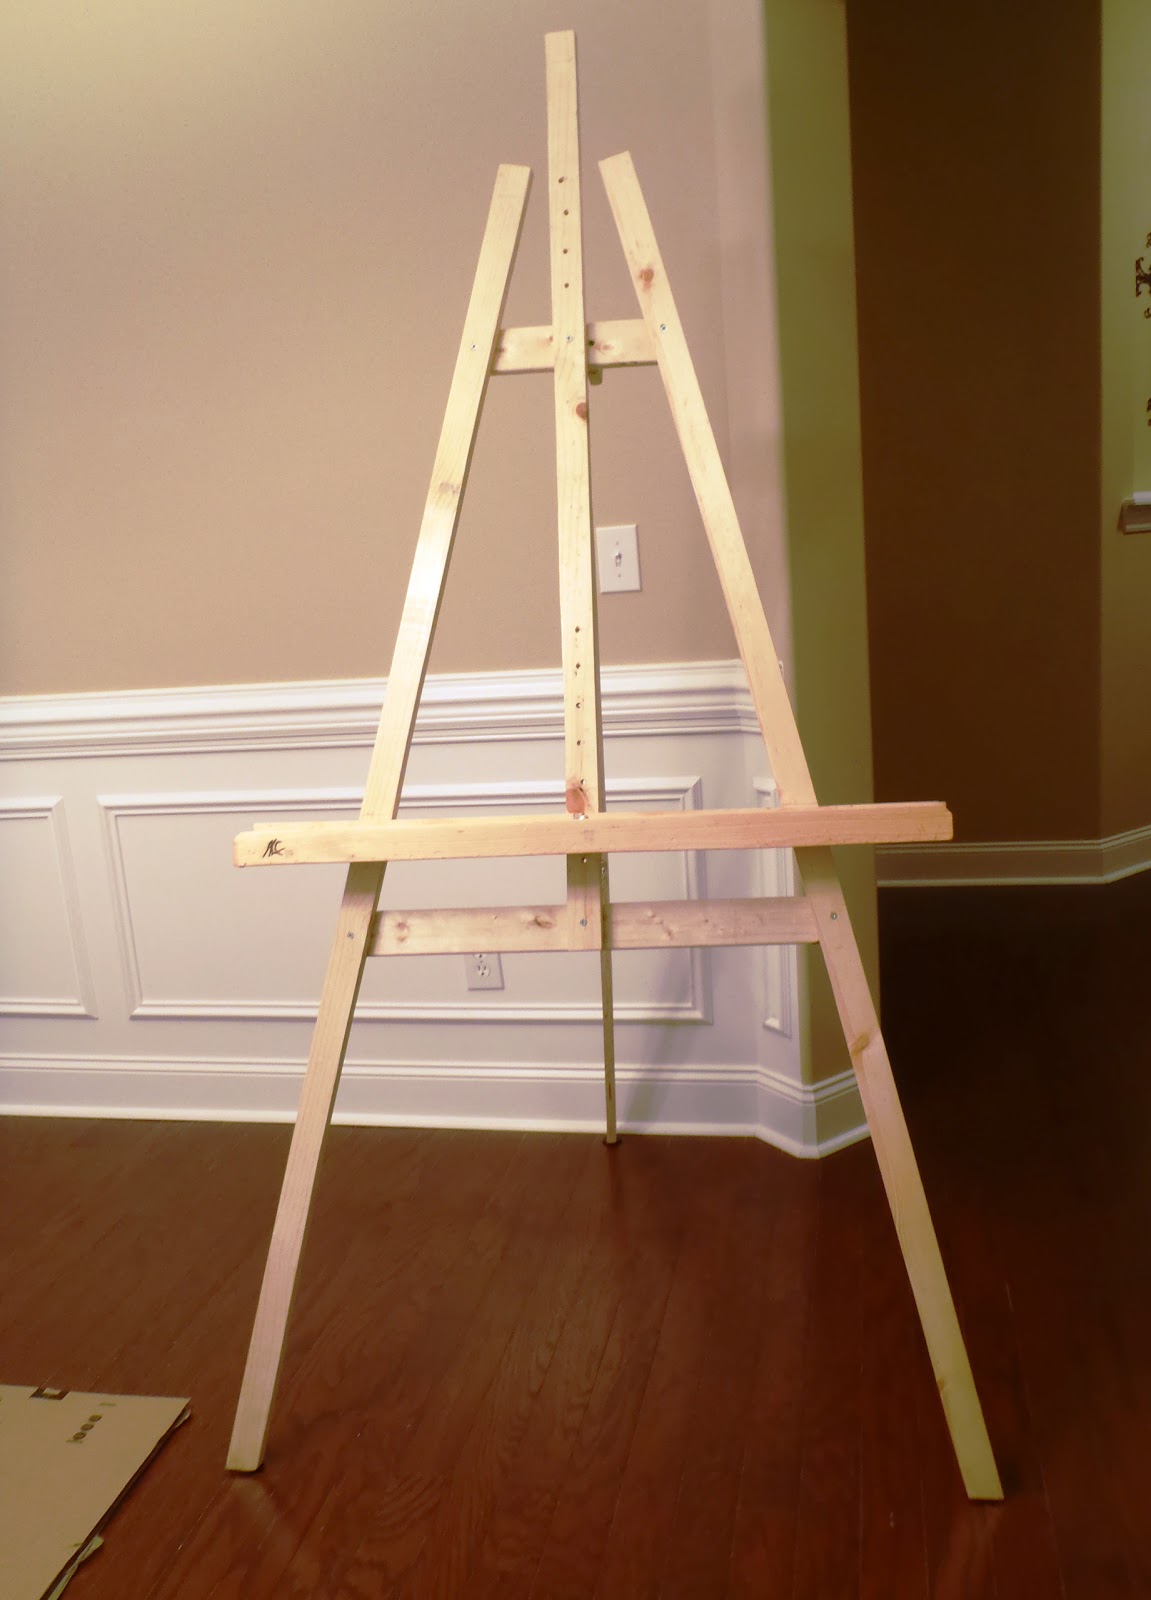
This easel can be built by virtually anybody who never built anything before who needs sturdy easel on a tight budget. I am designing this easel as I built it so the steps may seem out of order. I took a lot of photos so anybody can follow the steps (and don't have to read long worded instructions, I'm a visual learner and I hate reading manuals myself ha ha!)
How to Built an Artist Easel
Materials List:
(4) 1/4 - 20 X 3-1/2 carriage bolt
(4) flat washers
(4) 1/4 - 20 wing nut
screws
22" chain link
(2) small eye bolt
wood glue
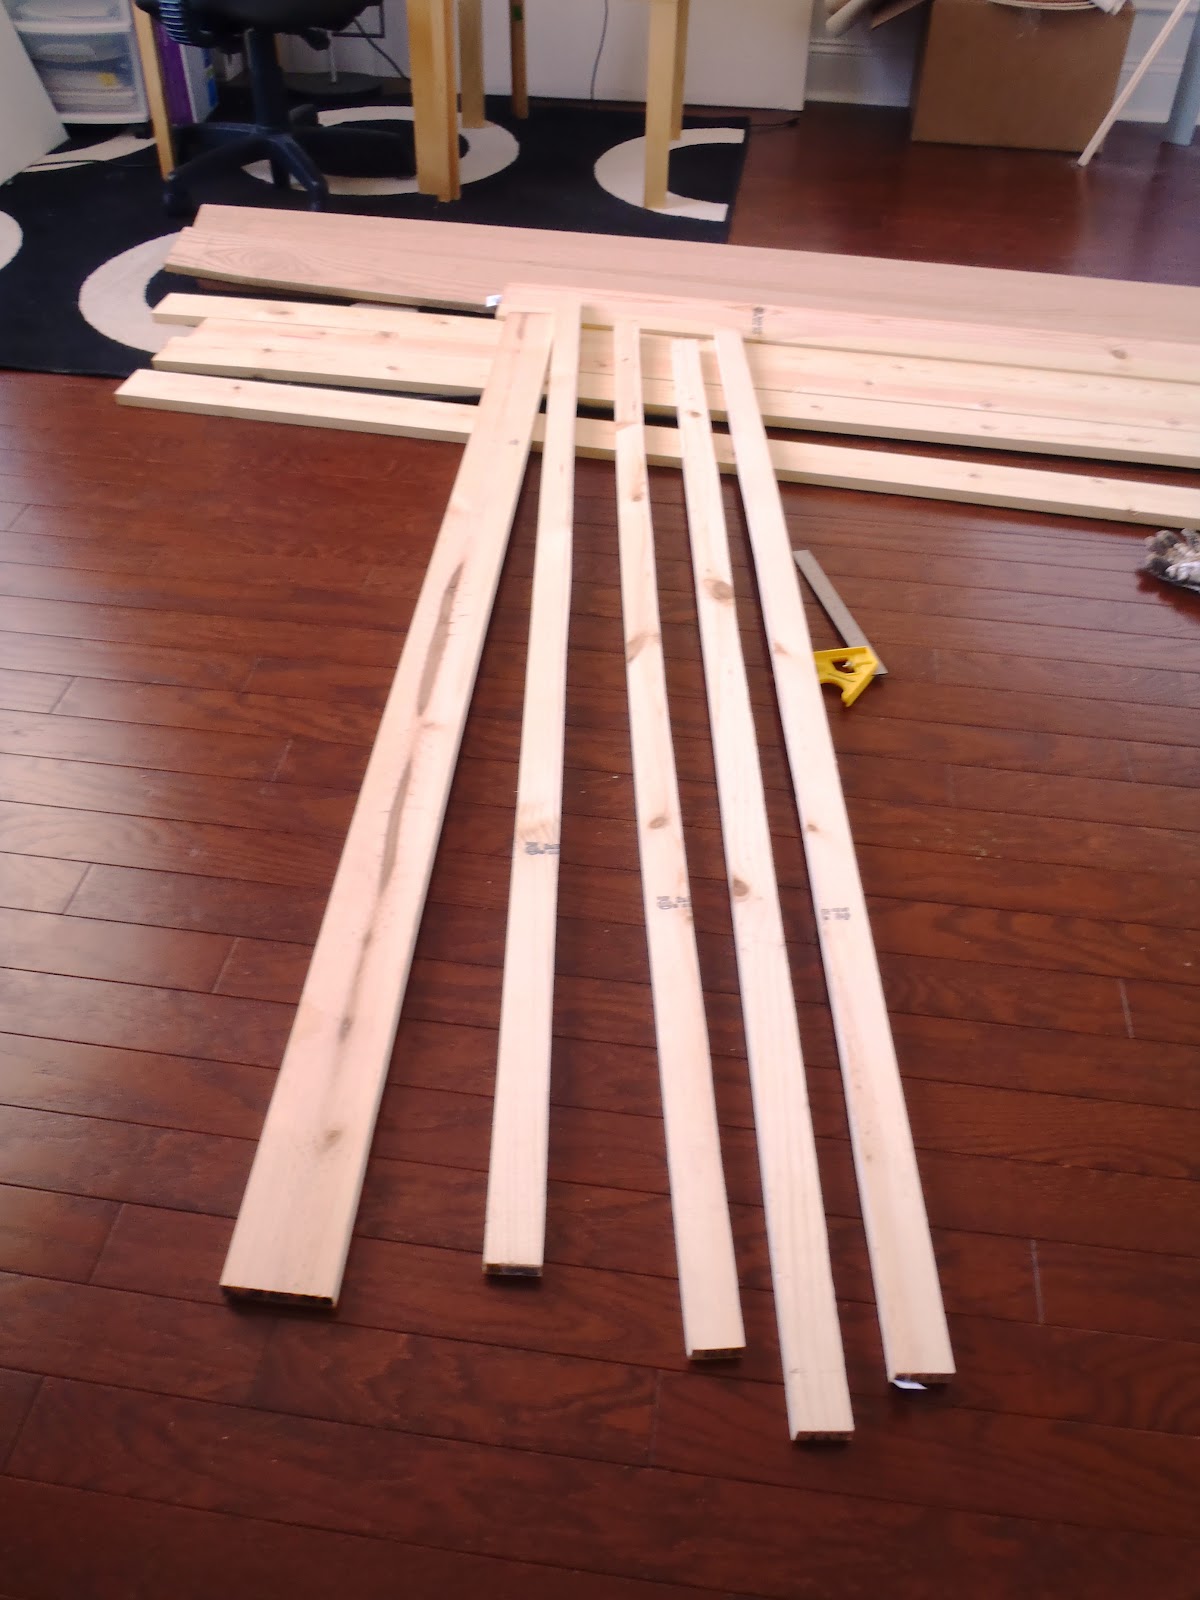
Cut List:
(2) 1 X 2 X 6' (front legs)
(1) 1 X 2 X 63" (back leg)
(1) 1 X 2 X 50" (middle vertical support)
(4) 1 X 2 X 36" (canvas plate )
(1) 1 X 2 X 27-1/2" (lower horizontal brace)
(1) 1 X 2 X 12-1/2" (upper horizontal brace)
(2) 1 X 2 X 2" (front legs and back leg connector pieces)
Steps:
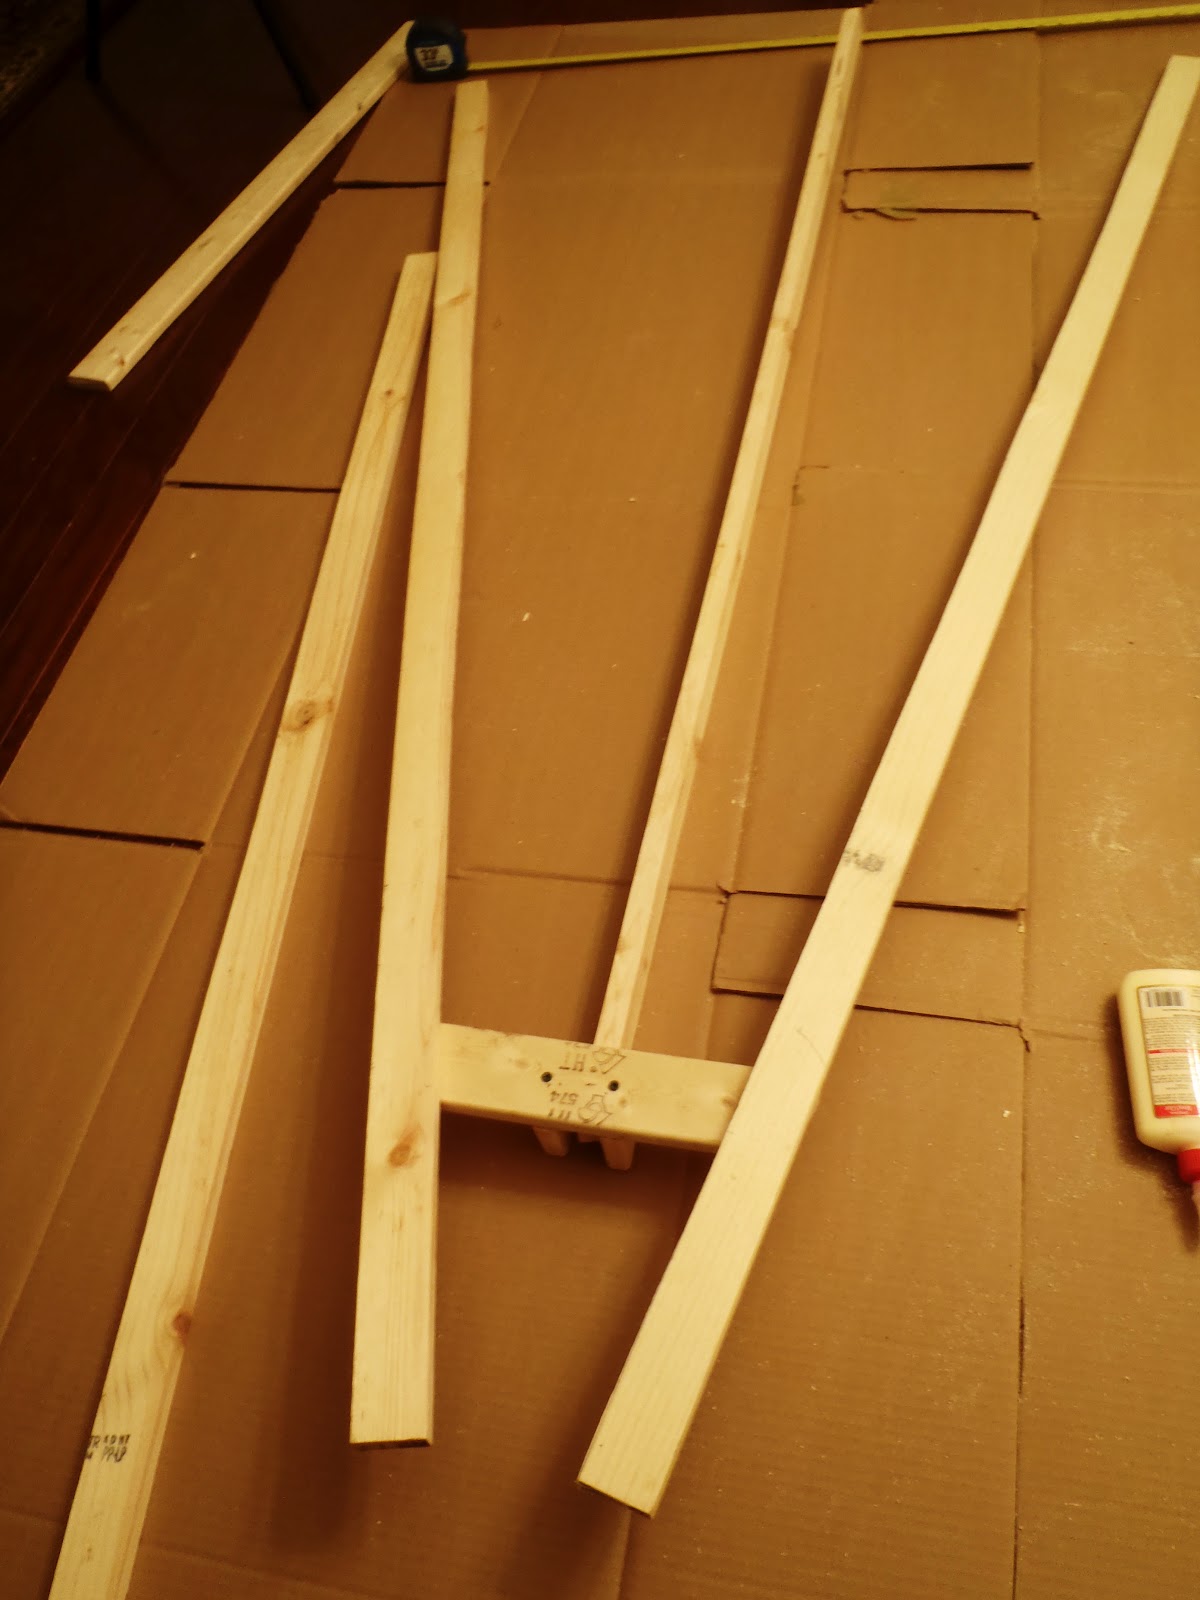
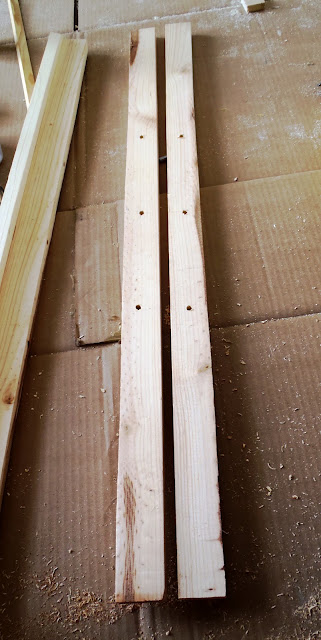
1. Prepare and cut boards using the Cut List above. 2. Position boards 7-1/2" on upper and 40" on lower apart
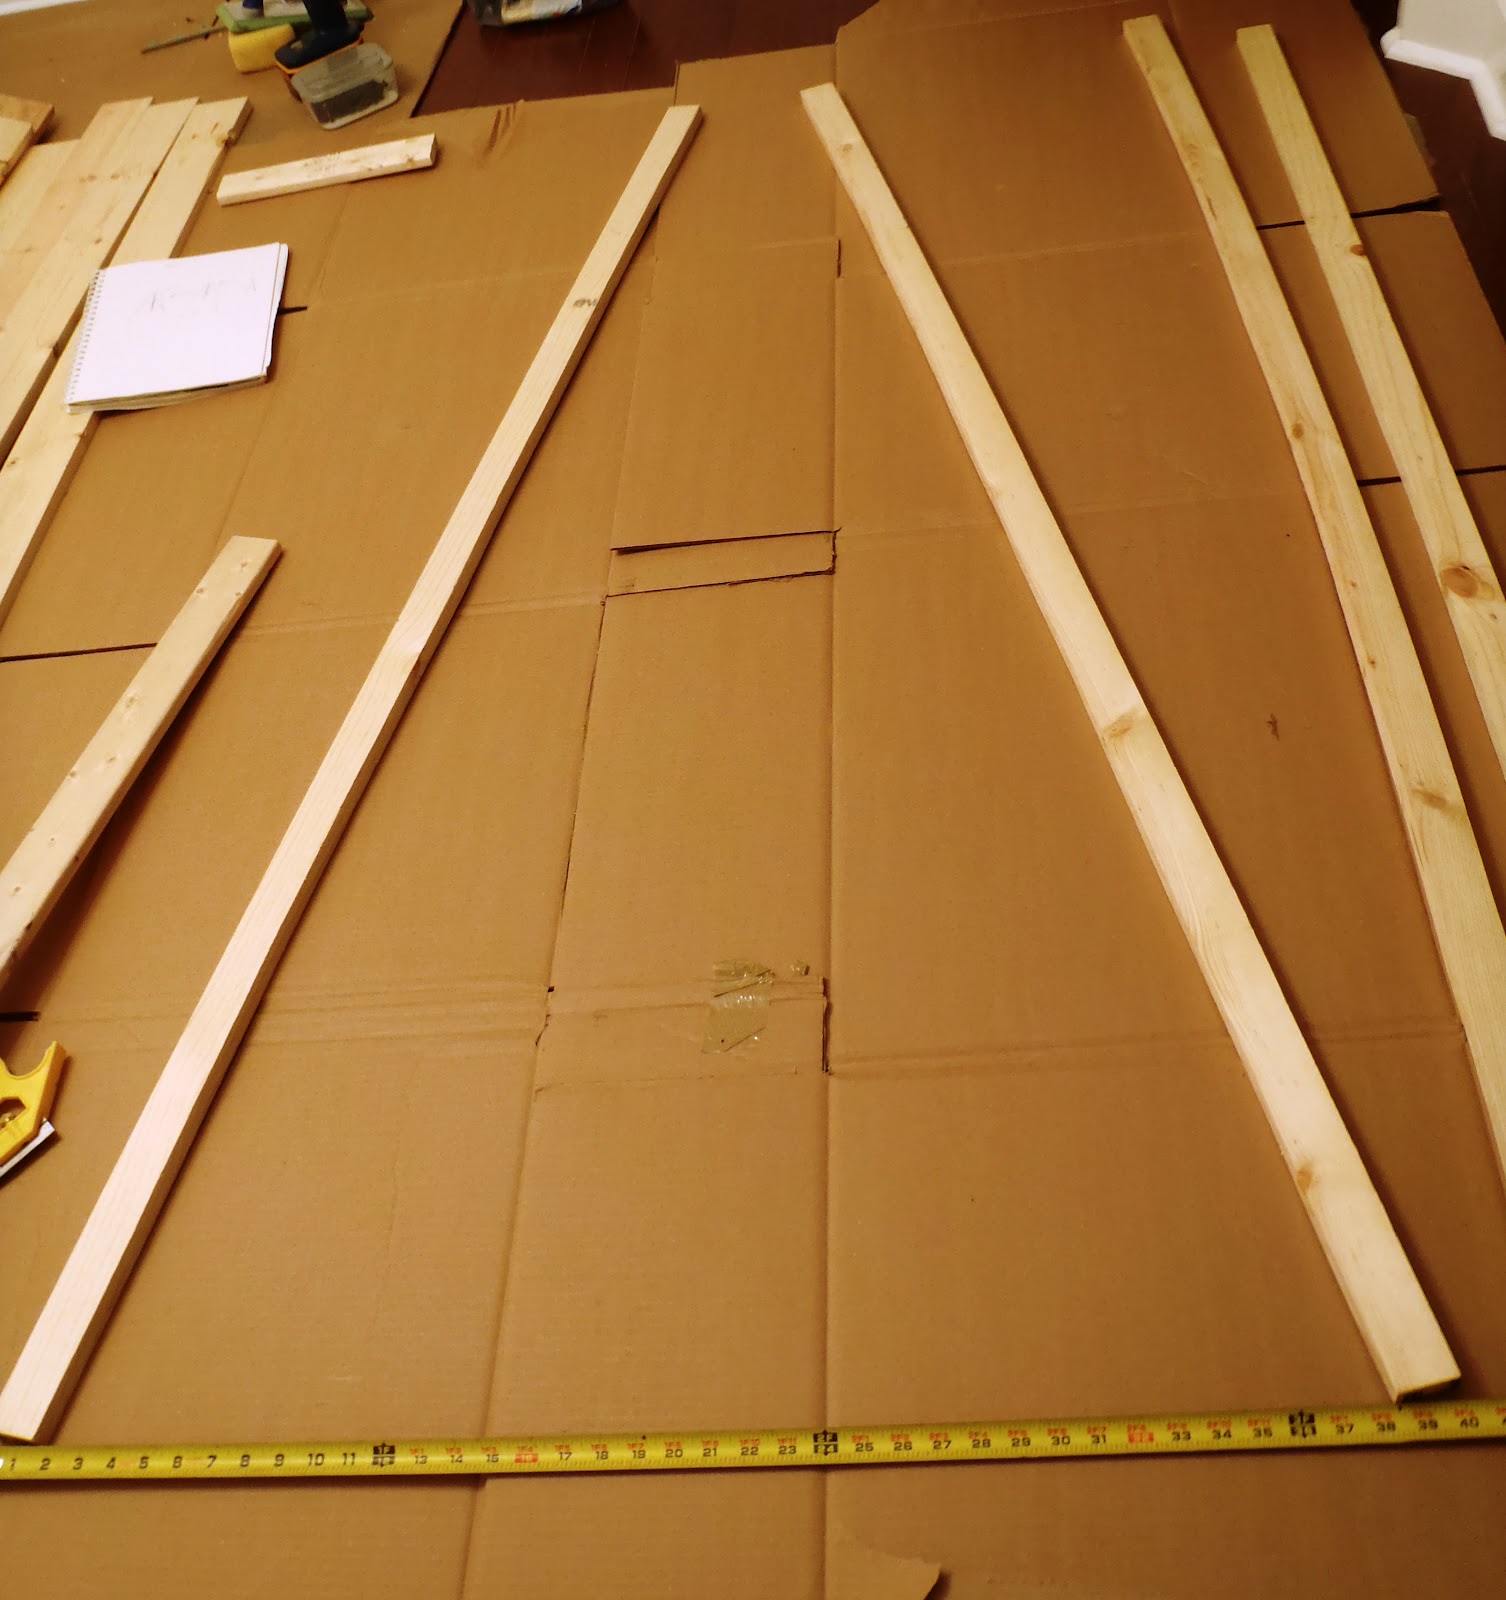
3. Position the top brace 9" from top of legs, mark. 4. Trim excess sides. It should look like this.


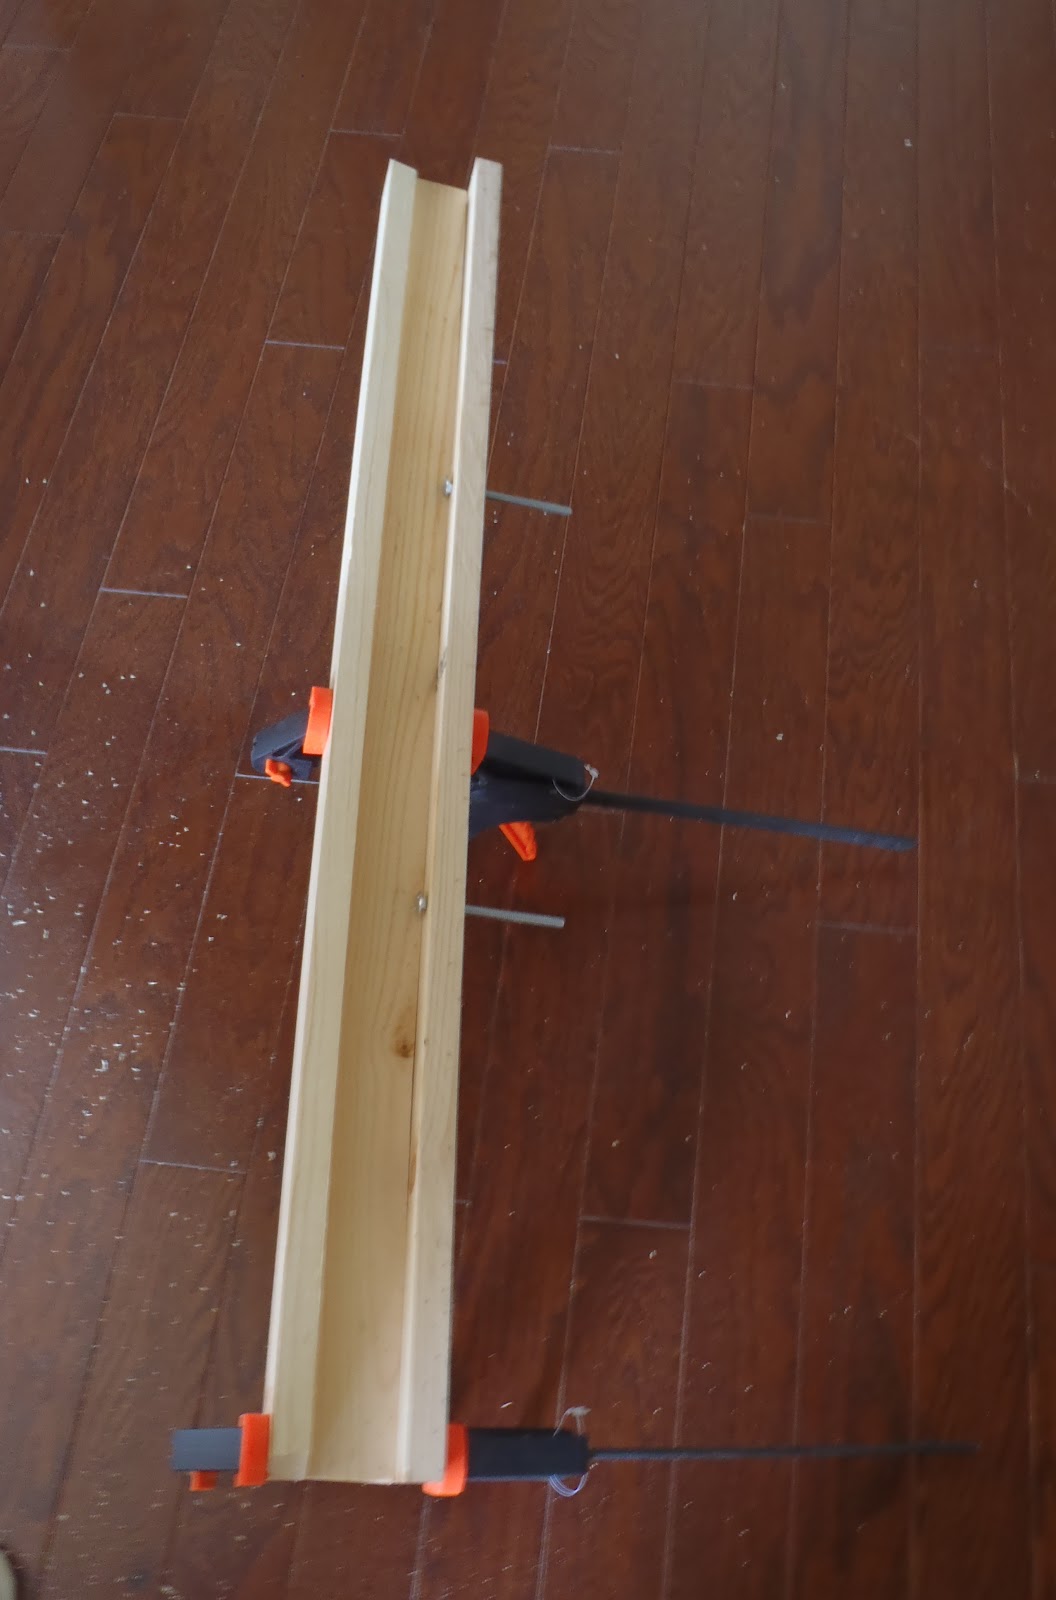
5. Attach the 2"X2" pieces as shown.

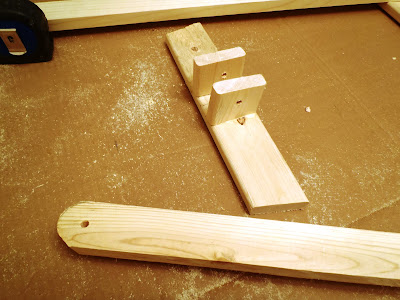
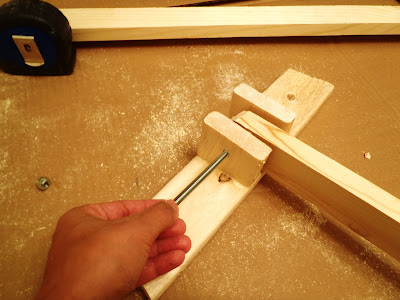
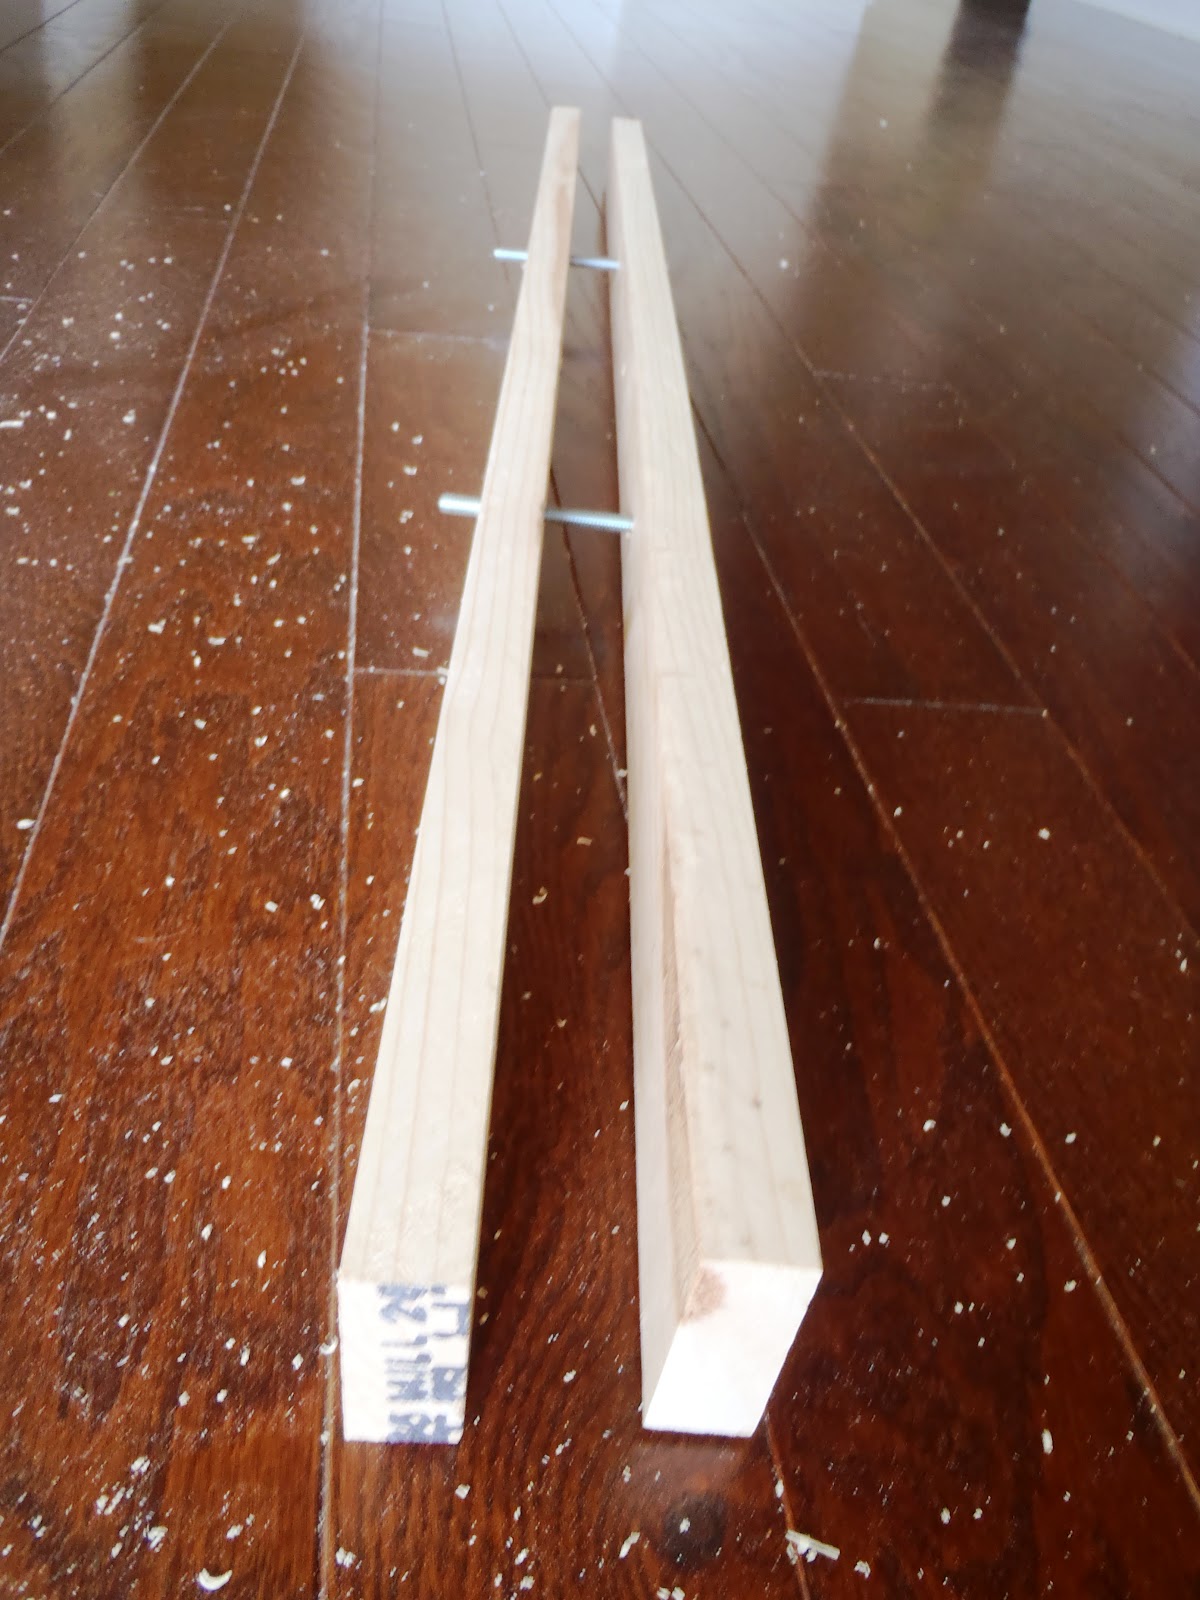
7. Align and insert bolt.

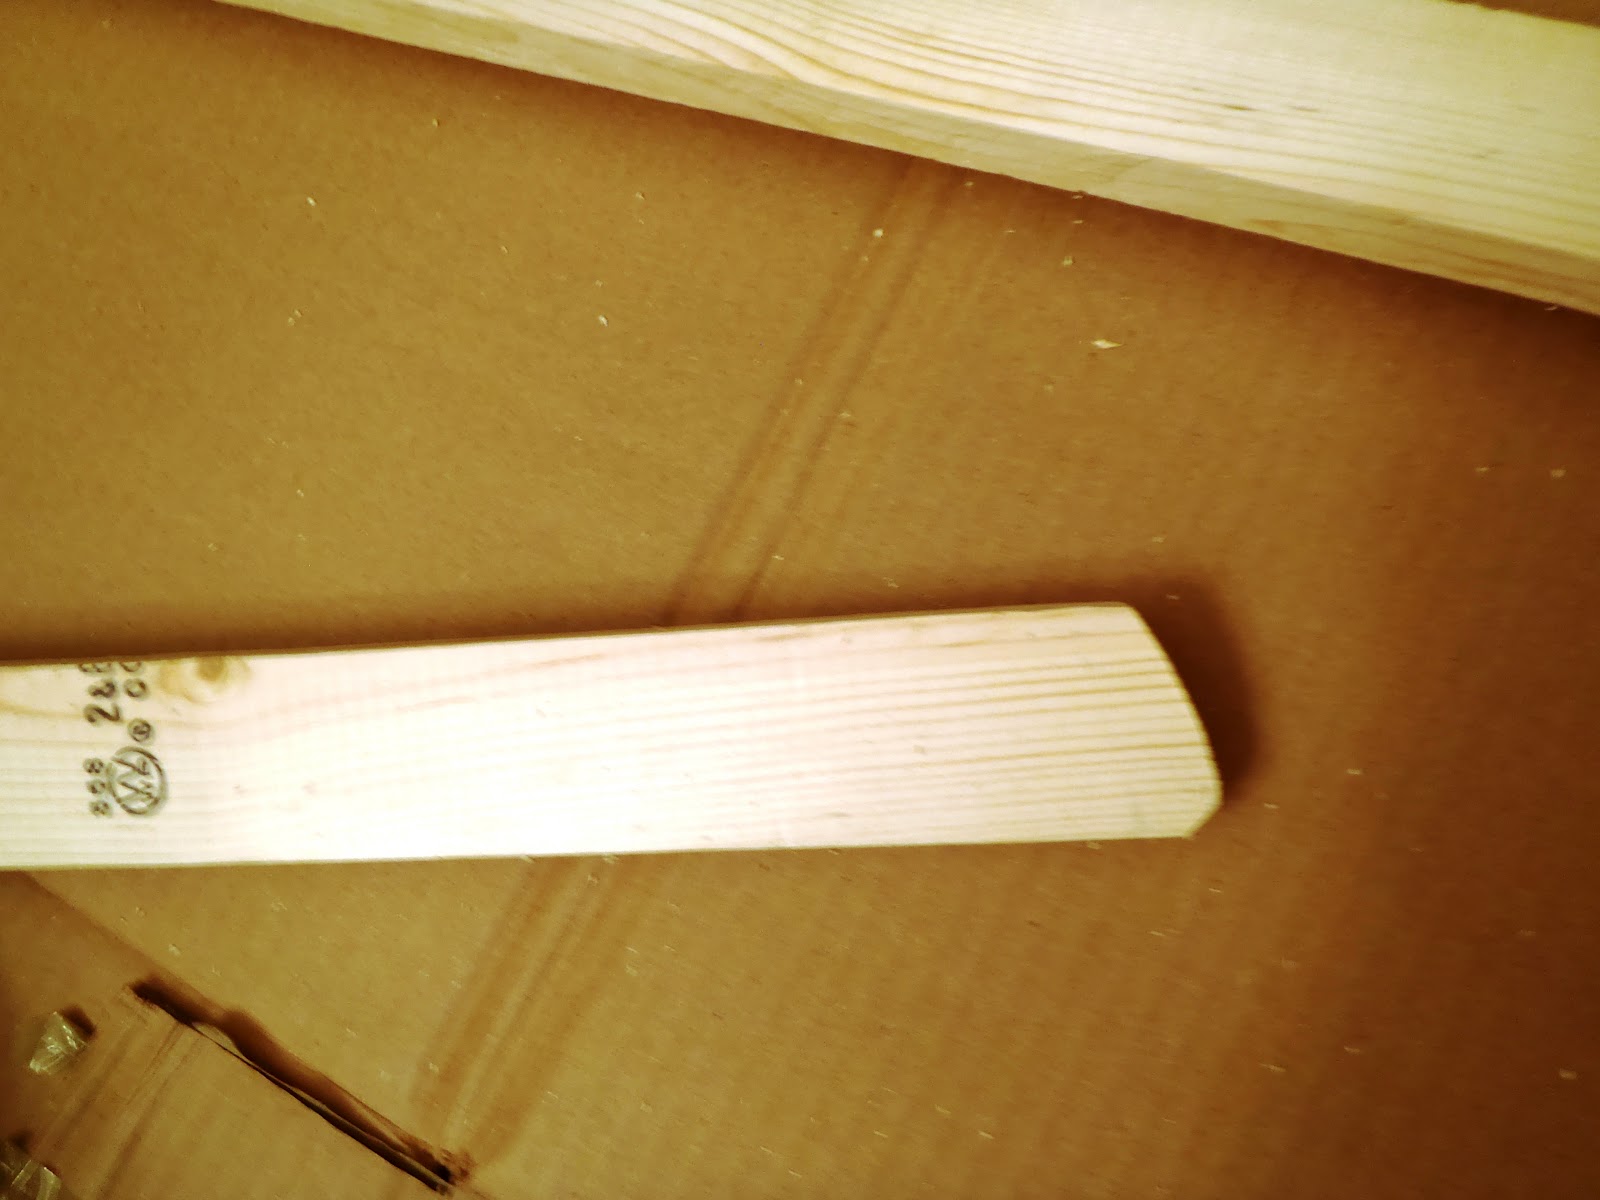
8. Shape the lower part of the back leg as shown for easy sliding.
 |
| the T- back or third back leg |
9. Attach back leg to the front legs. 10. Attach the lower horizontal brace.

11. Attach the chain links using eye bolts.

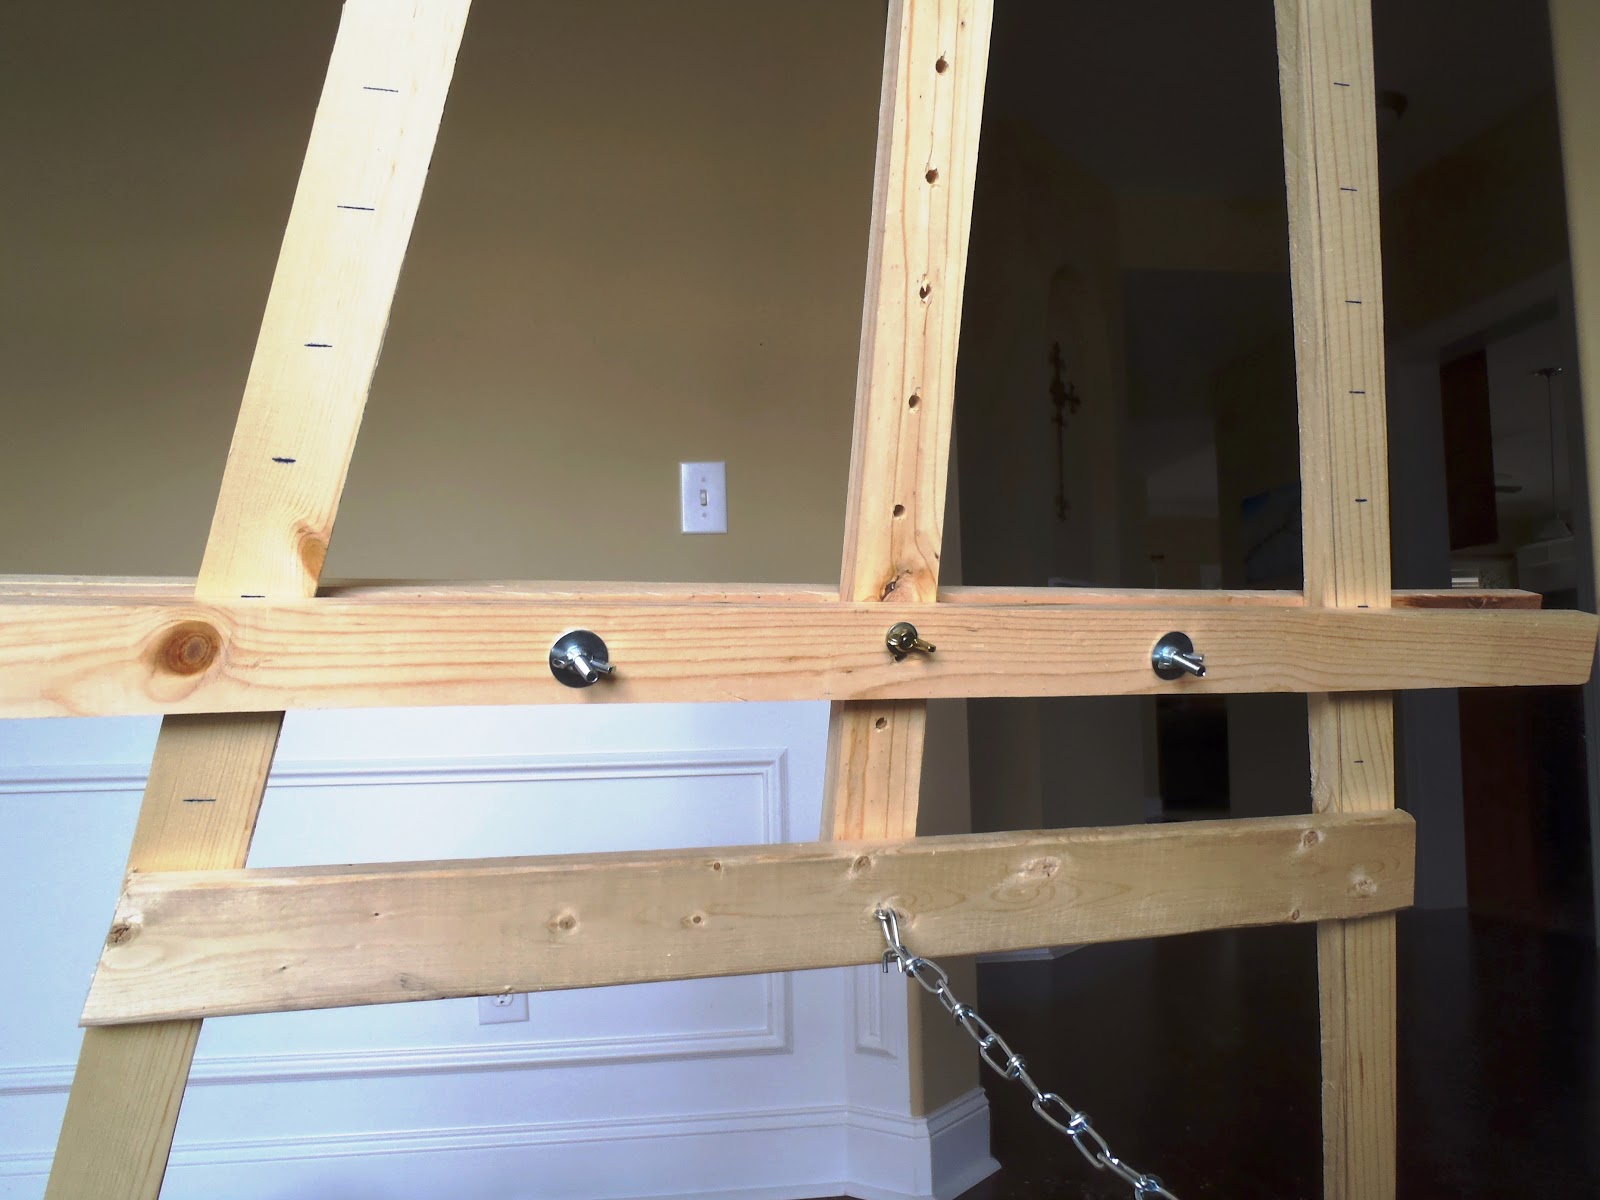
12. Drill holes and attach middle support .
 |
| add more holes if you want to add canvas clamp |

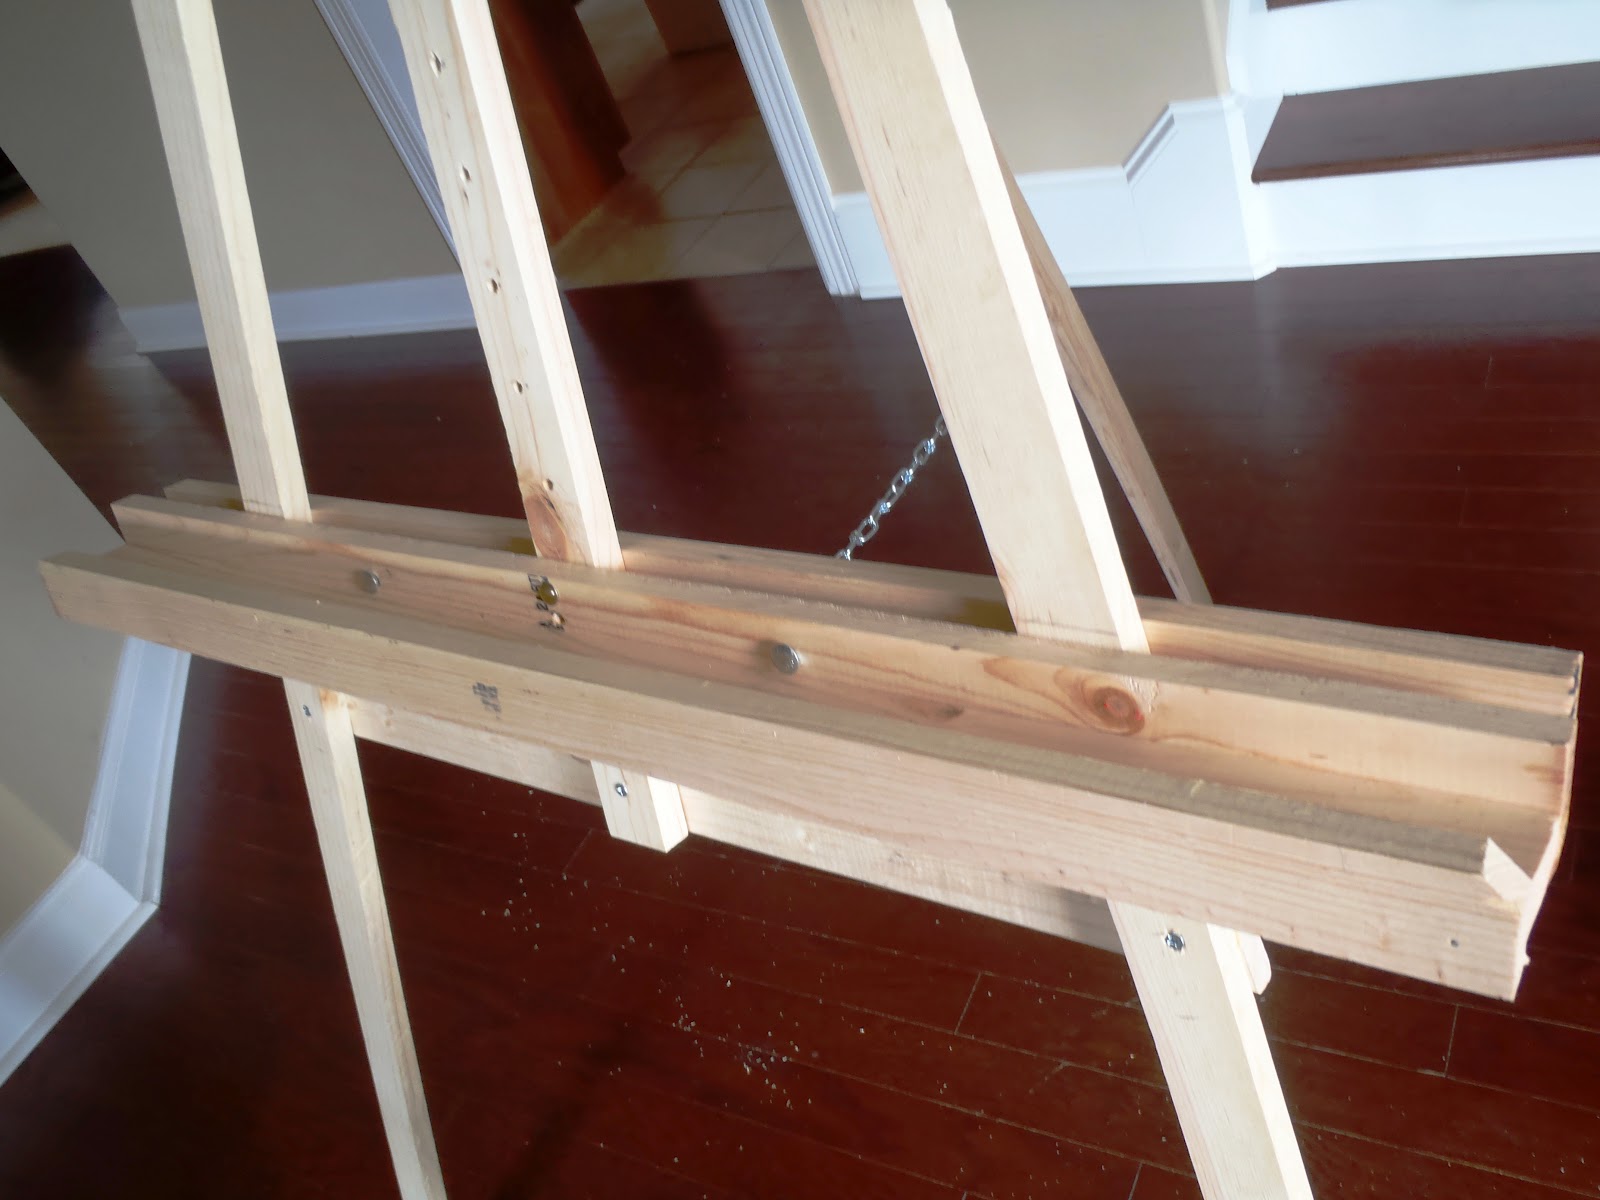
13. Start assembling the canvas plate.

14. Drill the other two horizontal piece for the bolts.
15. Check alignment using bolts. Detach. 16. Finish the canvas plate.
17. Attach the canvas holder to the main part using the last horizontal piece.
 |
| bevel the front edge for neater look |
Mark guides for easier leveling when adjusting the canvas holder.
18. Sand and wax and you're DONE!
 |
| I beveled the front legs to 10 degrees angle for better stability |
 |
| the bought one and the built one |
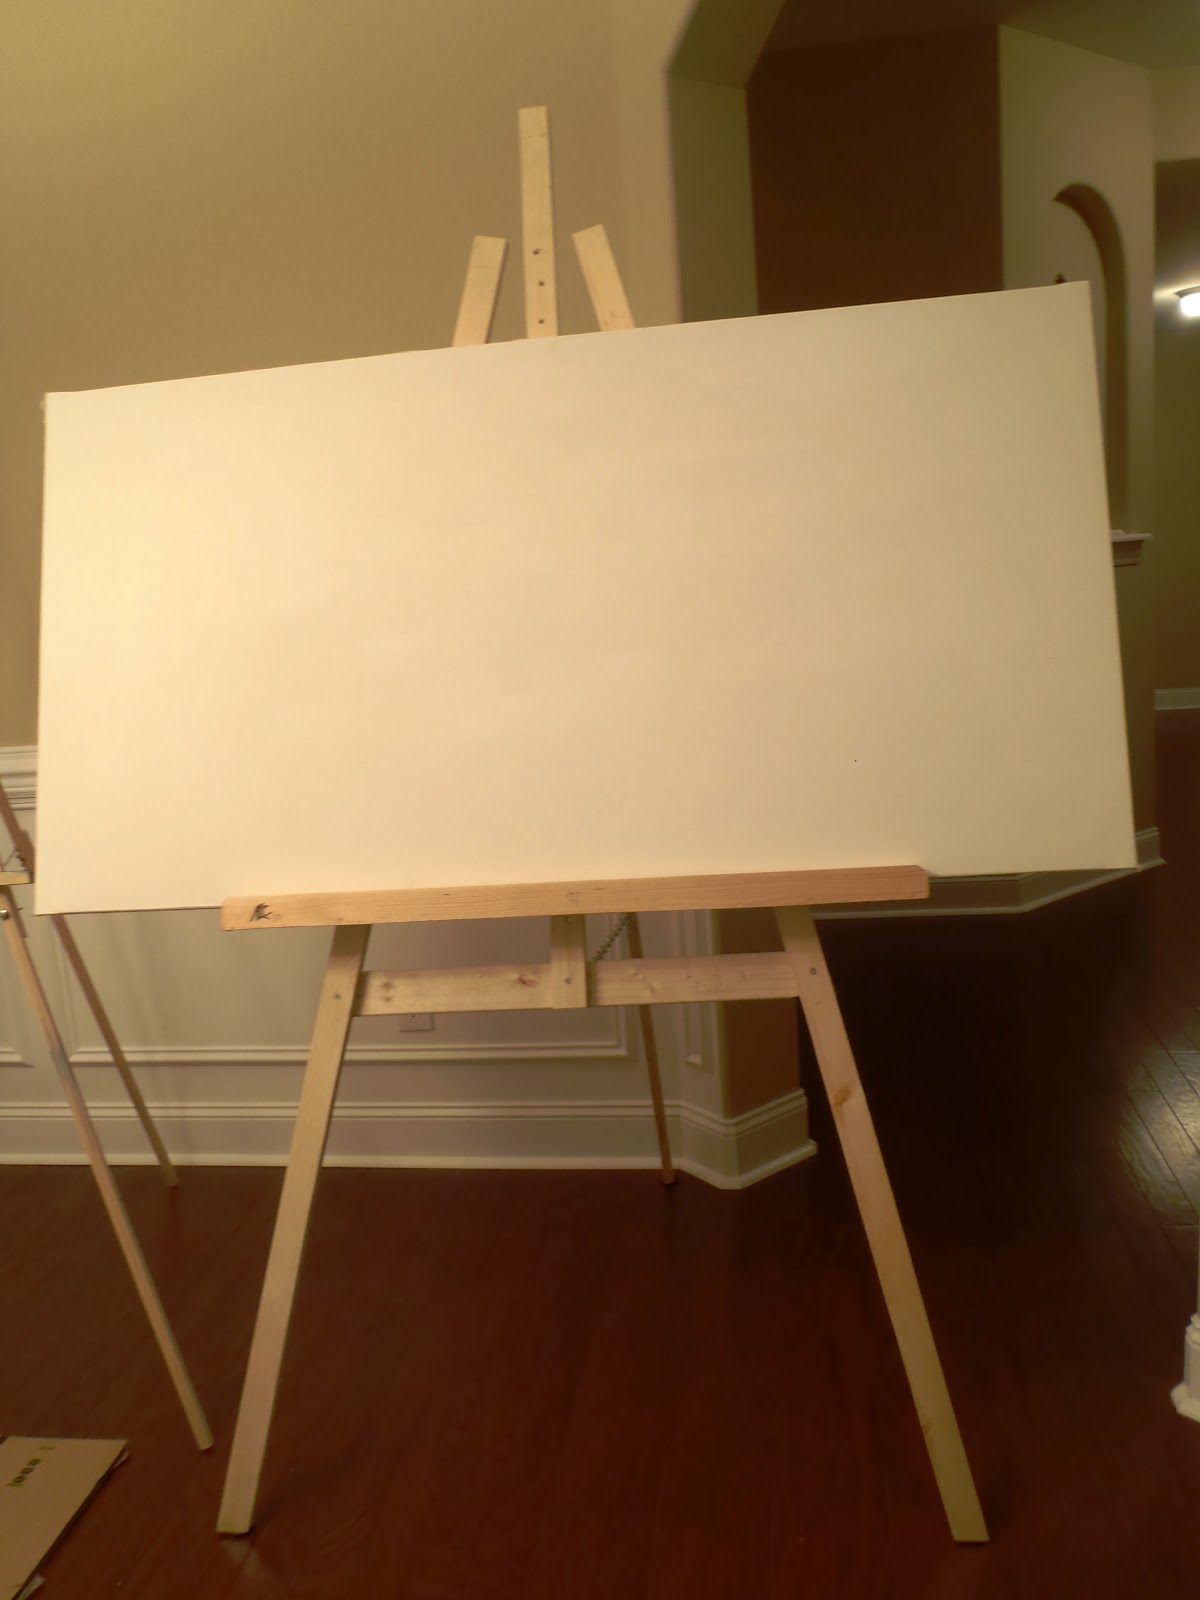 |
| a lot more sturdy |
 |
| the 50 bucks and the under 15 bucks easel |
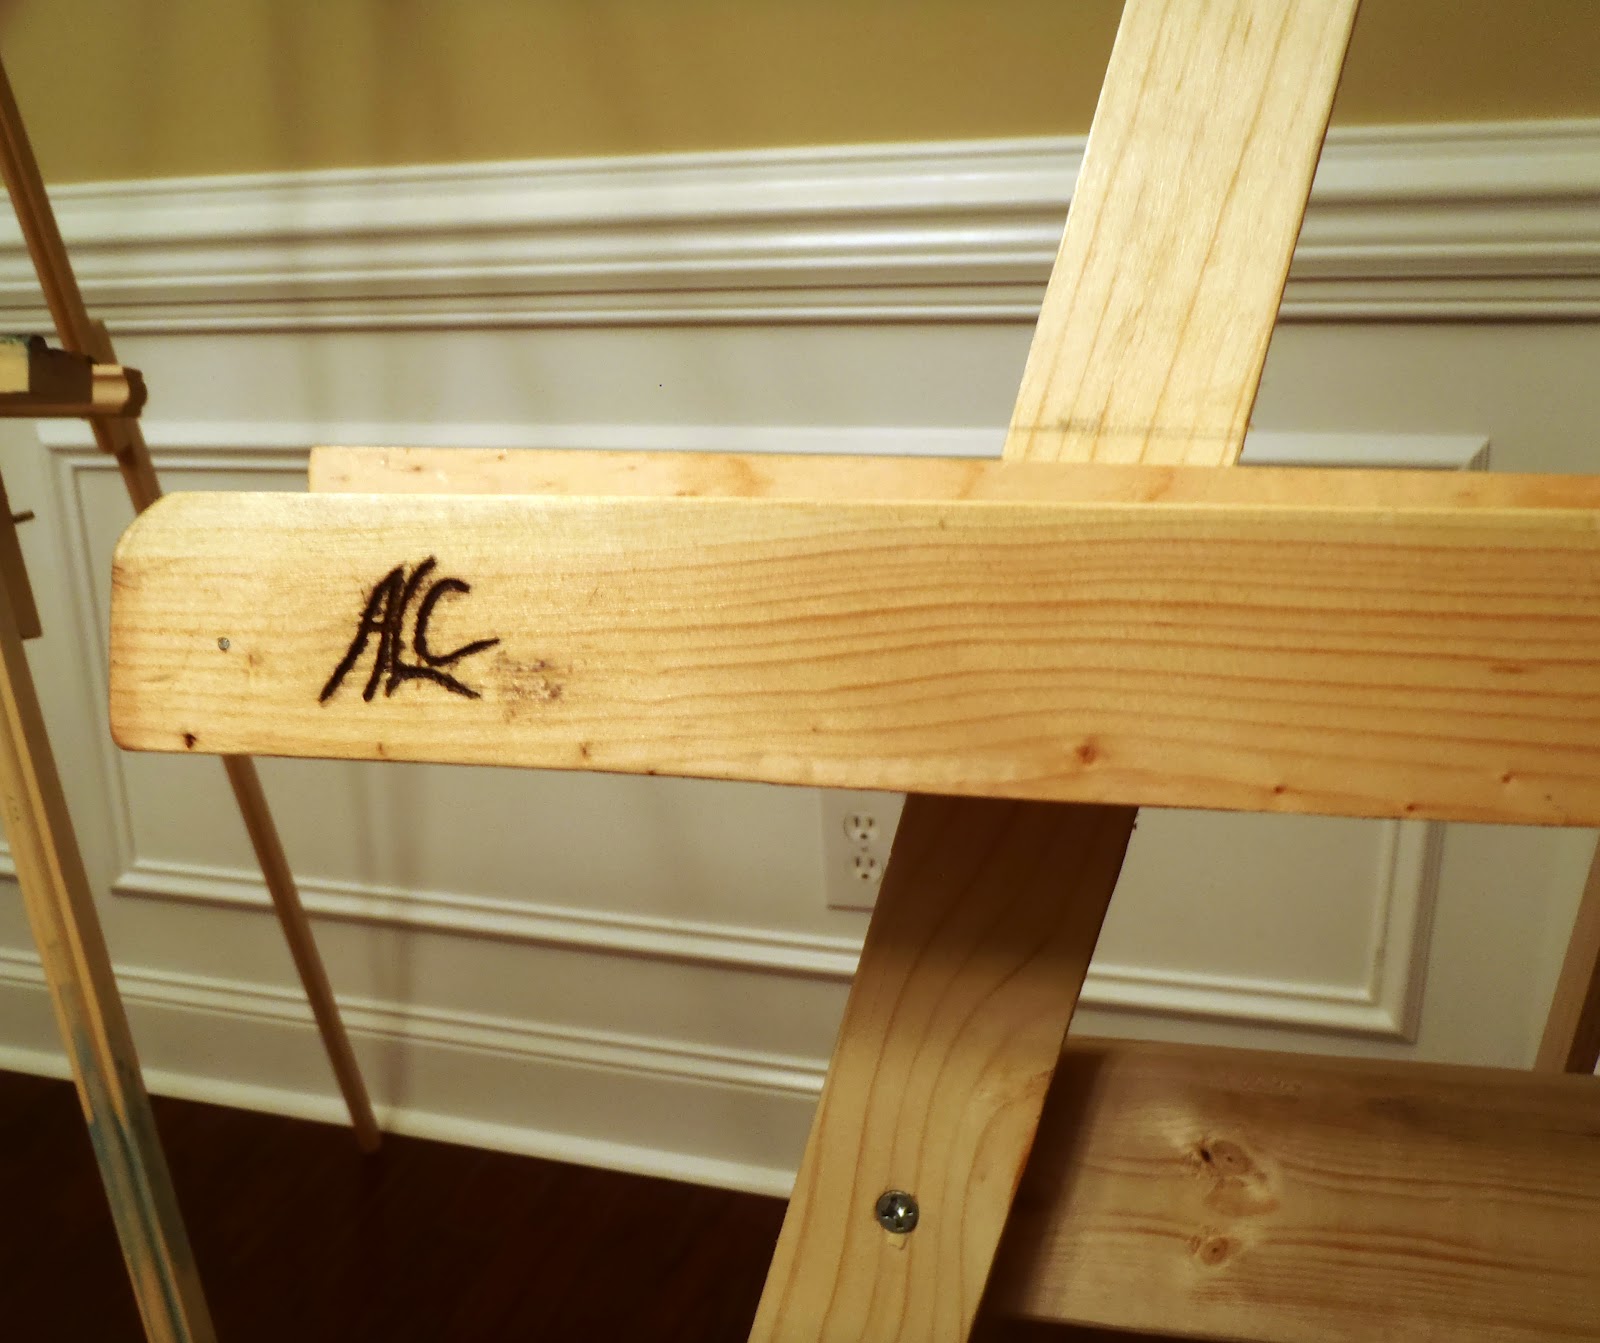 |
| don't forget the final touch as this piece will last you a long time.... |
wooow looks great
ReplyDeletethanks susu
Deletejust made one great stuff thanks was easy too made it out of the slats from an old bed :)
ReplyDeleteNicee! ...and a lot LESS
Deletehey, liz, i just wanted to say thanks for the directions and specs, this was so helpful when i put together my easel this weekend. go DIYers. --chris
ReplyDeletesteps were kind of out of order, I'm glad you were able to follow it ok,Chris
DeleteThanks a lot, Liz! Even though the lumberyard had the wrong wood in the 1 X 2 spot, I was able to make it work. I did glue the canvas plate together without putting the bolts in first. Don't do that, Gorilla glue is strong! I was able to pry it apart, put the bolts in and re-glue. Thanks again, I can't wait to use it!
ReplyDeleteLevi
enjoy painting Levi!
DeleteHi Liz in you cut list do you add the following details: (2) 1 X 2 X 6' (front legs) but your back leg are: (1) 1 X 2 X 63" (back leg) Aren't the front legs supposed to be; 1 X 2 X 63" too?
ReplyDeletePlease let me know
Thank You
Yes the back leg is shorter because you'll attach one end a bit lower from the top of the front legs( notice the picture):-)
Deletewait....the back one is shorter? so shouldn't it be 6' then and the front ones 6'3''?
Delete6 feet is 72 inches. 63 inches is shorter
DeleteHow big is the Easel stand in cm?
ReplyDeletegreat and thanks. I am going to try it this weekend. Very clear instructions. Thanks
ReplyDeleteSwami, India
Thank you so much for this! I was getting discouraged with the price of easels and I found this. Picked up the supplies today and im well on my way (and ive never built anything before in my life). Great, easy to follow instructions.
ReplyDeletesalamat....(filipino word for thanks)
ReplyDeleteyw:-)
DeleteGreat job indeed! But could you please use centimetres!
ReplyDeletethanks. next build, I will remember to add measurement in centimeter unit as well.
Deletegreat job liz, i got a question whats the length measurement starting at the lower horizontal brace down to the foot of the front leg? and also the length measurement of the upper horizontal brace to the top of the front leg?
ReplyDeletethanks.
it looks like there is more than 4 carage bolts holding it to gather.....?
ReplyDeleteThank you so much for the easel plans will try my hand at this weekend
ReplyDeleteCynthia Brannon
I'm in the middle of constructing this now. I have a couple questions though. How far up the legs its the horizontal brace? Also are the braces made out of 1x2? ThEy look bigger in the pic. And there seem to be a lot of holes. Are u sure we only need 4 bolts?
ReplyDeleteHey! This is so amazing! I love my 17 dollar easel. Thanks so much!
ReplyDeleteThanks liz...my fiance built me one and finished in with a red mahogany stain...so beautiful. ..I love it. He's going to do another one as soon as he gets the free time so we can paint together already have the supplies!!!
ReplyDeleteThanks for posting the plans. I made a few improvements. I used 1x3 for the top horizontal brace, as well as the center vertical piece is 1x3 with holes drilled every inch. Doesn't add weight, but it is now a little stronger.
ReplyDeleteThank you.
georgiegeorge@verizon.net
for those used to the Metric system, you can look at a conversion table, ( maybe public Library/ or the internet) I have
ReplyDeleteamong all books a very small booklet with all conversion tables. also in some Calendars, there are very where seems to me.
Just take a few minutes and you will find them. I am Spanish so that is why I know.
We use metric system, which is very simple every thing is in.010/ convert 1 Inch, to Centimeters and so on..
to Anonymous:
ReplyDeletefront legs are 6 Ft. long that is 72 Inches 63 Inches is less than 72" no?
hope that answer
Are the legs 1"x2' or 1"x3"
ReplyDeleteWe used your plans to make the easel, with some minor modifications, for the display board at our weekly Farmer's Market. If you are ever out our way in Murrieta CA- we would love to give you some jam in appreciation. Thx again for the post.
ReplyDeleteThis summer, I built an easel from your plans (also with modifications). Total cost was $22.50. Thanks.
ReplyDeleteThanks for the plans! I ripped down a scrap 2x12 to build mine, results are here. https://medium.com/@ericburke/scrap-wood-easel-4b61b2bbaade
ReplyDeleteThanks for this easy plan,I used white pine and it came out beautifully followed the instructions and it came out perfect.added a little stain to match the furniture,how can cbc I send a pic.
ReplyDeleteWhat is the distance from the bottom plate to the bottom of the front legs? I cannot locate any distance after going over the plates a number of times.
ReplyDeleteHere is a photo of my easel from the Lazy Liz design - https://www.flickr.com/photos/128563668@N05/15751973138
ReplyDeletethis is an awesome easel and I think much better than the commercial one. I will probably be trying my hand at making this. I wonder if I could simply adjust the measurements to make a table top version.
ReplyDeletewhat wood did you use
ReplyDeletelooks a bunch better than the bought one
ReplyDeletewhat kind of wax is used?
ReplyDeleteJust made one on a Saturday morning. Have about 8 bucks into this project!
ReplyDeleteI built this and it functions great, but wish you had given more instruction for the inept like me! Some parts were confusing with just imagery. I also didn't realize I needed screws or how long, added a wrinkle into it. Nevertheless it was cheap, fun, and looks good even though I did it very messily.
ReplyDeleteThanks
I would appreciate some help with the canvas support the picture provided is not clear if 1x2 or 1x3 is used for the ledge of the shelf to support the canvas.
ReplyDeleteThanks! My friends and girlfriend think this is great! I used recycled hardwood leftover from the screens' frame in the background of this pic!
ReplyDeletehttps://www.instagram.com/p/BKbv5VABZwU/
Hi Liz, how far apart were the holes drilled?
ReplyDelete"asante sana", swahili words- means thanks a lot
ReplyDeleteI’m really happy with how mine came out. We made it out of a really lovely cedar. My only alteration may be to cut the legs a little shorter since I sit as I paint and like to bring the canvas down lower. Thanks for this post!
ReplyDeleteHi Liz
ReplyDeleteMarvelous Job. I made one for my daughter, its not the money factor its your personal touch and so happy that made one.
It is like one day my daughter will remember that it has been made by my dad kind of stuff. Amazing work and the steps were easy to figure out.
Once again thanks for the post.
I Syed
I think this is an informative post and it is very useful and knowledgeable. therefore, I would like to thank you for the efforts you have made in writing this article. Easel Stand
ReplyDeleteI have been looking for an easel for displays at art shows. I want a simple construction that is easy to carry yet sturdy. This plan looks like an easy build and would be perfect for this type of display. I am going to use this plan and finish it with a stain and a clear coat poly. Thank you for sharing
ReplyDeleteSounds Good,
ReplyDeleteI like to read your blog. You shared a wonderful information about display easel nz. Thanks for sharing this amazing stuff.
If you be considered a experienced on the internet business owner, you know the ability associated with utilizing a strong refocus as well as hyperlink cloaking software program that will help you increase your own affiliate marketer fee affiliate payouts. majestic seo backlinks
ReplyDeleteVery clear instructions you have shared. Thanks for sharing the tutorial.
ReplyDeletebest stand up desk
Really a great addition. I have read this marvelous post. Thanks for sharing information about it. I really like that. Thanks so lot for your convene. בניית בית בזול
ReplyDeleteVery informative and useful post. I see you have a lot of other cool stuffs available in your disposal, I am going to bookmark it to read in my spare time. Thanks and keep the good work up.
ReplyDeleteSwing Set California
I just want to say thank you for sharing a great information.I've read a lot of blogs but most of them are boring. Your article made me feel fascinating. I am going to share this information with my friends on social media networking sites! Swing Set California
ReplyDeleteI just want to say thank you for sharing a great information.I've read a lot of blogs but most of them are boring. Your article made me feel fascinating. I am going to share this information with my friends on social media networking sites!10 Best Disney Amusement Parks
ReplyDeleteVery clear instructions you have shared. Thanks for sharing the tutorial.
ReplyDeleteVery clear instructions you have shared. Thanks for sharing the tutorial.
ReplyDeletehttps://megafillers.com
Really a great website. I have read this marvelous post. Thanks for sharing information about it. I really like that.
ReplyDeleteThank you Liz. I built your easel. It looks great and it saved me a lot of lime, trial and errors.
ReplyDeleteEskişehir
ReplyDeleteDenizli
Malatya
Diyarbakır
Kocaeli
F5M
Diyarbakır
ReplyDeleteKırklareli
Kastamonu
Siirt
Diyarbakır
8V41KR
görüntülüshow
ReplyDeleteücretli show
ZCJ7X6
https://titandijital.com.tr/
ReplyDeletesivas parça eşya taşıma
mardin parça eşya taşıma
karaman parça eşya taşıma
manisa parça eşya taşıma
18İRX6
https://titandijital.com.tr/
ReplyDeleteısparta parça eşya taşıma
ankara parça eşya taşıma
izmir parça eşya taşıma
diyarbakır parça eşya taşıma
FSB8
giresun evden eve nakliyat
ReplyDeletebalıkesir evden eve nakliyat
maraş evden eve nakliyat
kastamonu evden eve nakliyat
kocaeli evden eve nakliyat
8LTF
maraş evden eve nakliyat
ReplyDeleteosmaniye evden eve nakliyat
adıyaman evden eve nakliyat
istanbul evden eve nakliyat
ordu evden eve nakliyat
ZBGNİT
kayseri evden eve nakliyat
ReplyDeleteaydın evden eve nakliyat
kütahya evden eve nakliyat
gümüşhane evden eve nakliyat
balıkesir evden eve nakliyat
7HN2
düzce evden eve nakliyat
ReplyDeletedenizli evden eve nakliyat
kırşehir evden eve nakliyat
çorum evden eve nakliyat
afyon evden eve nakliyat
04C
tekirdağ evden eve nakliyat
ReplyDeletekocaeli evden eve nakliyat
yozgat evden eve nakliyat
osmaniye evden eve nakliyat
amasya evden eve nakliyat
XC1X12
CA610
ReplyDeleteAydın Evden Eve Nakliyat
Manisa Evden Eve Nakliyat
Çorum Evden Eve Nakliyat
Mardin Parça Eşya Taşıma
Erzurum Parça Eşya Taşıma
A8EF6
ReplyDeleteİstanbul Şehirler Arası Nakliyat
Aksaray Parça Eşya Taşıma
Bartın Şehir İçi Nakliyat
Yalova Lojistik
Burdur Şehirler Arası Nakliyat
Elazığ Şehir İçi Nakliyat
Gate io Güvenilir mi
Hotbit Güvenilir mi
Ünye Asma Tavan
6BA3B
ReplyDeleteDxy Coin Hangi Borsada
Çerkezköy Oto Boya
Area Coin Hangi Borsada
Sivas Şehirler Arası Nakliyat
Yozgat Şehir İçi Nakliyat
İzmir Evden Eve Nakliyat
Çorum Şehirler Arası Nakliyat
Etimesgut Parke Ustası
Çerkezköy Organizasyon
7AE23
ReplyDeleteAmasya Lojistik
Aydın Şehirler Arası Nakliyat
Urfa Lojistik
Afyon Evden Eve Nakliyat
Rize Şehir İçi Nakliyat
Kırklareli Şehir İçi Nakliyat
Loop Network Coin Hangi Borsada
Nevşehir Şehirler Arası Nakliyat
Ünye Oto Elektrik
FEFB8
ReplyDeleteMuğla Şehirler Arası Nakliyat
Kocaeli Şehir İçi Nakliyat
Gölbaşı Parke Ustası
Karaman Lojistik
Denizli Şehir İçi Nakliyat
Yalova Şehirler Arası Nakliyat
Yobit Güvenilir mi
Tekirdağ Lojistik
Ünye Marangoz
E112A
ReplyDeleteOkex Güvenilir mi
Mexc Güvenilir mi
Balıkesir Lojistik
Siirt Parça Eşya Taşıma
Iğdır Evden Eve Nakliyat
Bitrue Güvenilir mi
NWC Coin Hangi Borsada
Hatay Evden Eve Nakliyat
Batıkent Parke Ustası
89B72
ReplyDeleteOrdu Lojistik
Hatay Parça Eşya Taşıma
Manisa Lojistik
Silivri Duşa Kabin Tamiri
Artvin Parça Eşya Taşıma
Tekirdağ Çatı Ustası
Muğla Şehir İçi Nakliyat
Karabük Parça Eşya Taşıma
Kırklareli Şehirler Arası Nakliyat
DA563
ReplyDeleteAdıyaman Şehirler Arası Nakliyat
Amasya Lojistik
Ünye Televizyon Tamircisi
Etimesgut Fayans Ustası
Tekirdağ Cam Balkon
Bartın Evden Eve Nakliyat
Çerkezköy Marangoz
Sivas Evden Eve Nakliyat
Karabük Evden Eve Nakliyat
2FD0B
ReplyDeletekars random görüntülü sohbet
sinop kadınlarla sohbet
niğde mobil sohbet bedava
canlı sohbet et
manisa bedava sohbet uygulamaları
yozgat canlı sohbet bedava
düzce rastgele sohbet
burdur sesli sohbet siteler
mardin yabancı canlı sohbet
05978
ReplyDeletemanisa görüntülü sohbet uygulama
izmir bedava görüntülü sohbet sitesi
Kilis Sohbet Sitesi
mobil sesli sohbet
malatya sohbet uygulamaları
Kırşehir Görüntülü Sohbet Yabancı
kızlarla canlı sohbet
elazığ sohbet siteleri
kırıkkale rastgele görüntülü sohbet uygulamaları
EBA2C
ReplyDeleteTelegram Görüntüleme Satın Al
Linkedin Beğeni Hilesi
Shinja Coin Hangi Borsada
Paribu Borsası Güvenilir mi
Coin Nasıl Üretilir
Bitcoin Giriş Nasıl Yapılır
Soundcloud Reposts Satın Al
Bitcoin Yatırımı Nasıl Yapılır
Binance Referans Kodu
75759
ReplyDeleteCoin Kazma
Bitcoin Yatırımı Nasıl Yapılır
Arbitrum Coin Hangi Borsada
Görüntülü Sohbet
Facebook Beğeni Hilesi
Bulut Madenciliği Nedir
Osmo Coin Hangi Borsada
Sonm Coin Hangi Borsada
Referans Kimliği Nedir
CF130
ReplyDeleteSohbet
Linkedin Beğeni Satın Al
Loop Network Coin Hangi Borsada
Bitcoin Nasıl Oynanır
Kwai Takipçi Hilesi
Bone Coin Hangi Borsada
Youtube İzlenme Satın Al
Arbitrum Coin Hangi Borsada
Kripto Para Oynama
B9FDF
ReplyDeleteyearn
safepal
quickswap
chainlist
defillama
ellipal
trust wallet
pancakeswap
arbitrum
6ACC1
ReplyDeletereferans kimliği
binance
ilk kripto borsası
bitcoin ne zaman çıktı
bingx
https://toptansatinal.com/
binance
bitget
mexc
F23D7
ReplyDeletebingx
toptan sabun
coinex
mexc
mexc
kripto para telegram
huobi
papaya meyvesi
bybit
39A52
ReplyDeleteTonya
Palandöken
Sarıoğlan
Kurtalan
Bahçe
Battalgazi
Burdur
Kocaeli
Selim
DA9A5
ReplyDelete----
----
----
----
----
----
matadorbet
----
----
00548
ReplyDeleteBlogger SEO
google 5 yıldız
tiktok seo
silkroad proxy satın al
site satışı
forum
offshore
backlink paketleri
Google SEO
asdsdfdresgtryrt
ReplyDeleteمهندس افران جدة
xdfvgfdgbhfnbfgjhgj
ReplyDeleteشركة مكافحة مكافحة بالهفوف
fghbfghfghfh
ReplyDeleteشركة مكافحة حشرات بالهفوف
ReplyDeletethanks for the information,lovely post
Comprar carta de condução
شركة كشف تسربات المياه بالدمام
ReplyDeleteكشف تسربات المياه
شركة عزل اسطح بالاحساء
ReplyDeleteHuhMFlwq5zV
شركة عزل اسطح بالقطيف
RgIWi1ZZN
شركة عزل اسطح بالدمام
QFbxhj
شركة عزل اسطح بالجبيل
lcMsvuh30Z
شركة مكافحة النمل الابيض بالدمام lszedXW5p4
ReplyDeleteشركة تنظيف خزانات s3efS3lBMU
ReplyDeleteشركة عزل اسطح بالدمام VrAjshHZ56
ReplyDeleteافضل شركة تسليك مجاري بالاحساء IeMuQhBOv9
ReplyDeleteشركة تنظيف خزانات k7yt3vXS7k
ReplyDeleteشركة مكافحة حشرات بابها ABlebWrAlE
ReplyDeleteشركة تنظيف كنب بالدمام bguPlHbm6E
ReplyDeleteBA5E0C46E5
ReplyDeletetakipçi satın al türk
1078E5DF16
ReplyDeletetiktok takipçi
9A564B6839
ReplyDeleteinstagram turk takipci
صيانة افران بمكه wIR604WrGr
ReplyDeleteD18181841F
ReplyDeletemobil ödeme takipçi satın al
Pasha Fencer Hediye Kodu
Kazandırio Kodları
MMORPG Oyunlar
Viking Rise Hediye Kodu
Razer Gold Promosyon Kodu
Zula Hediye Kodu
Brawl Stars Elmas Kodu
Roblox Şarkı Kodları
EF451A4B93
ReplyDeletetelegram coin oyunları
görev yap coin kazan
telegram coin kasma nedir
coin kazandıran oyunlar
butona bas coin kazan
54B138A4B5
ReplyDeleteTelegram Botları Telefona Zarar Verir mi
Telegram Airdrop Botları
Telegram Coin Kazma
Telegram Para Kazanma
Binance Hesap Açma
39C92941F2
ReplyDeletetiktok takipçi al
beğeni satın al
aktif takipçi
kaliteli takipçi
aktif takipçi
I have been searching to find a comfort or effective procedure to complete this process and I think this is the most suitable way to do it effectively. güvenilir siteler
ReplyDeletethc gummies
ReplyDeletethc pen
thc vape
Führerschein
Comprare Patente<“/a>
rijbewijs kopen c<“/a>
kup prawo jazdy<“/a>
Comprare carnet de conducir<“/a>